


How to Pack a Backpack
The following is an excerpt from AMC’s Mountain Skills Manual.
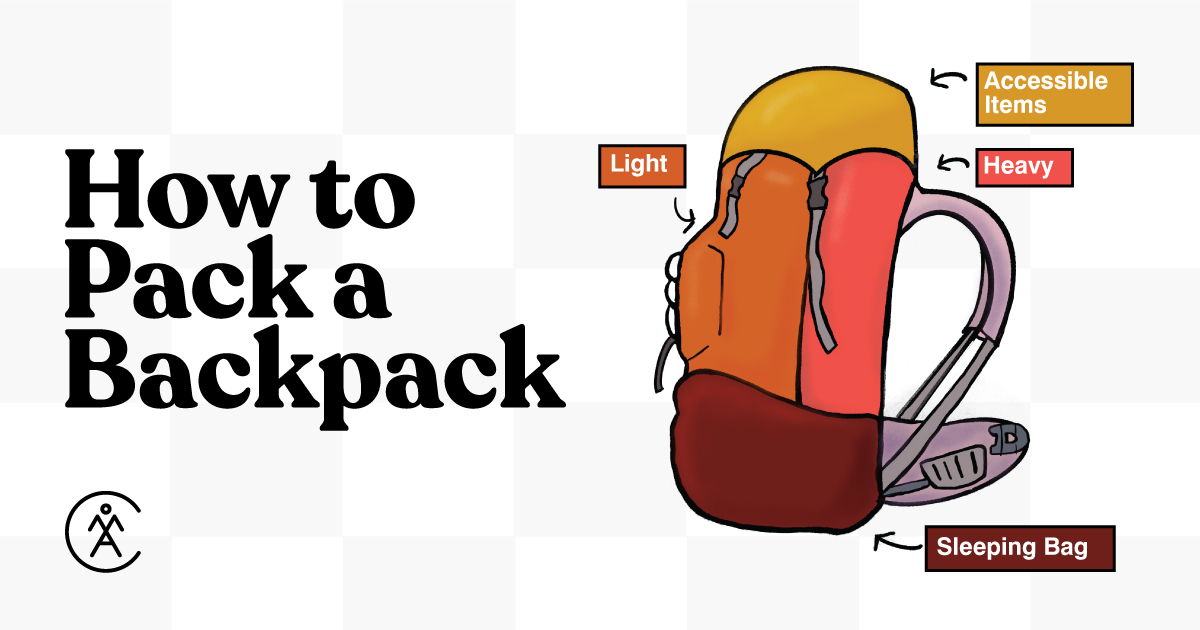
To reduce shoulder and hip discomfort, as well as to better organize and care for your equipment, it is best to load your pack by following some basic packing principles. We call these principles the ABCDs of packing. In this mnemonic, “A” stands for accessibility, “B” for balance, “C” for compactness, and “D” for dryness.
Accessibility
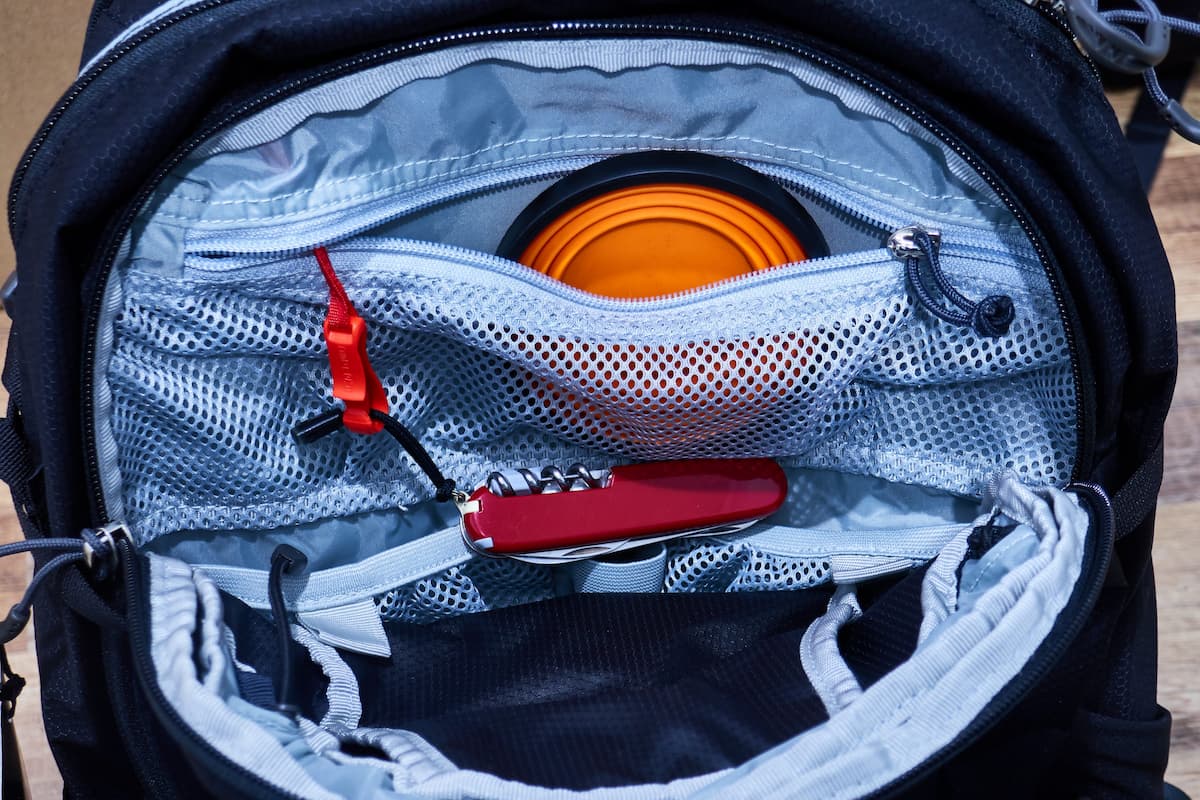
When packing your gear for a day on the trail, it’s important to think about what you will (or might) need to quickly retrieve during the hike. Some gear and items of clothing should be kept easily accessible so that no one in your group will have to wait for you in the rain because you stuck your raincoat at the very bottom of your pack. The items that are most often identified as “accessible” include: water bottle, trail food, sunglasses, sunscreen and lip balm, map, first-aid kit, headlamp, camp trowel, personal hygiene kit, compass, GPS, camera, and cell phone or other communication device. The “A” items should also include extra layers of clothing, such as a rain jacket and rain pants, a medium-weight upper layer, a warm hat and/ or a sun hat, and gloves or mittens. Items that do not need to be readily accessible include your sleeping equipment, shelter, kitchen equipment, and the rest of your clothing and camp shoes.
Depending on your pack, the location for these “A” items can vary, but often it’s effective to use the top lid pocket (a.k.a. brain) of the pack, followed by side or rear pockets, if your pack has them. Compress your supplementary warm and rain layers between the top of the pack’s main pack and the bottom of the lid pocket. Many modern packs come with a hydration system, giving you easy access via a hydration tube to water in a hydration bladder worn inside the pack. Other packs include water-bottle-sized side pockets specifically designed to be easily reachable without having to put down the pack or asking someone else to hand you your water.
Note that accessibility does not mean packing your pack like a Christmas tree. Forget about hanging many items on the exterior of your pack. These most likely will throw you off balance if they’re heavy or get caught on branches. Keep your gear inside and safe.
Balance
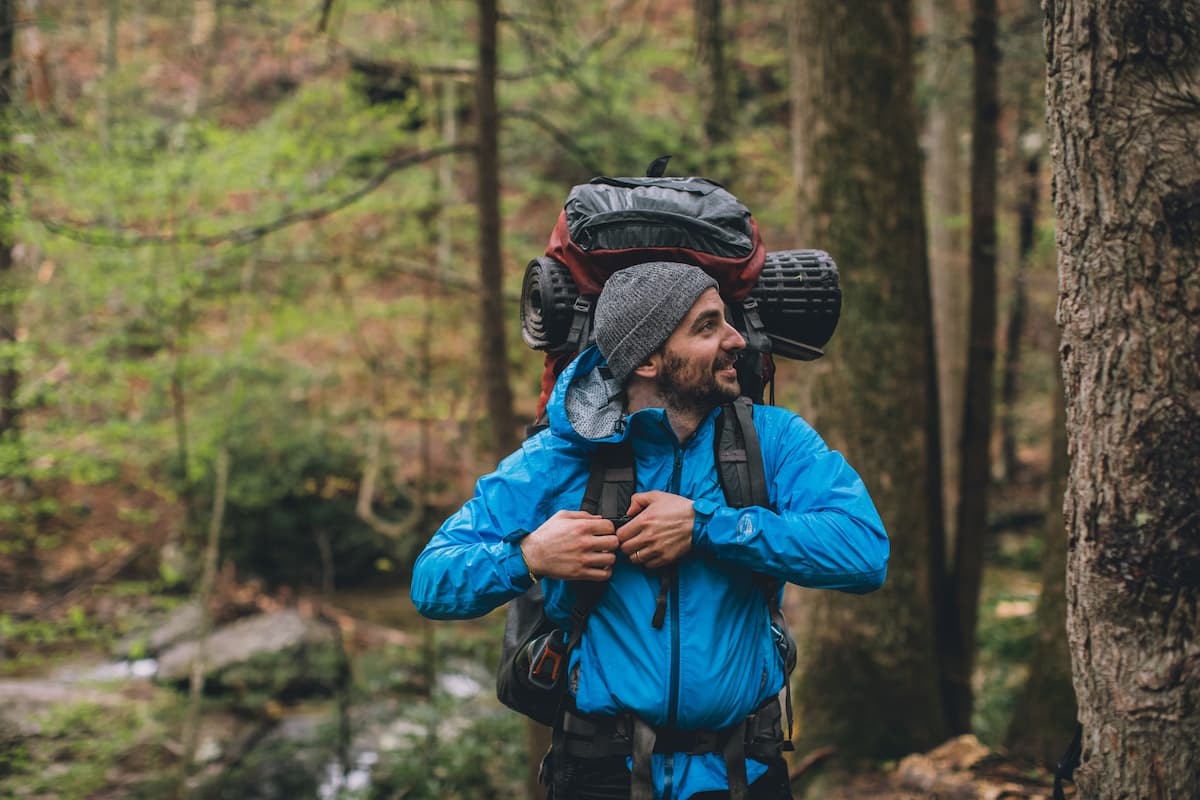
When it comes to balance, we’re now talking about your pack’s center of mass. Here, the word “balance” refers to three types of weight distribution that settle most of your pack weight on your hips, which in turn transfer most of the work of carrying your pack to your legs—the strongest set of muscles in your body.
Your pack weight needs to be balanced on its vertical axis, its horizontal axis, and its medial axis (i.e., depth). Your goal when packing the main compartment is to place the heaviest items closest to the pack harness, centered between the shoulder straps where the yoke is. Dense and heavy items, such as food, cooking gear, and your hydration system (if your pack has one), should be about two-thirds of the height of your main compartment on the vertical axis, mostly center on the horizontal axis, and anterior (or at the back) on the medial axis. If you place these items in this location, your pack’s mass will be located between your shoulder blades and close to your back. Remember, when the center of your pack’s mass is placed in this location, you will be able to transfer most of your pack weight onto your legs.

Compactness
Every pack has limited carrying capacity, but with a few tips and techniques, you can stretch this capacity much further. In other words, you can always put more in a pack than you think. Now, we are not advocating that you bring unnecessary equipment or clothing, but by using the right technique, you easily will be able to bring all of the gear you really need. Here are a few tips and techniques for compacting all of your gear in your pack.
- If your pack has an internal divider between its bottom and middle parts, consider removing it. Most dividers can be unzipped or detached easily. Dividers have a tendency to create empty spaces above and below them, and it’s easier to compact your equipment without them. Think of your pack as a big tube that is filled from the top.
- Start filling the bottom part of your pack with as many camp items as possible, such as your sleeping gear, warm clothing, and camp shoes. Use your fist to push down these soft items.
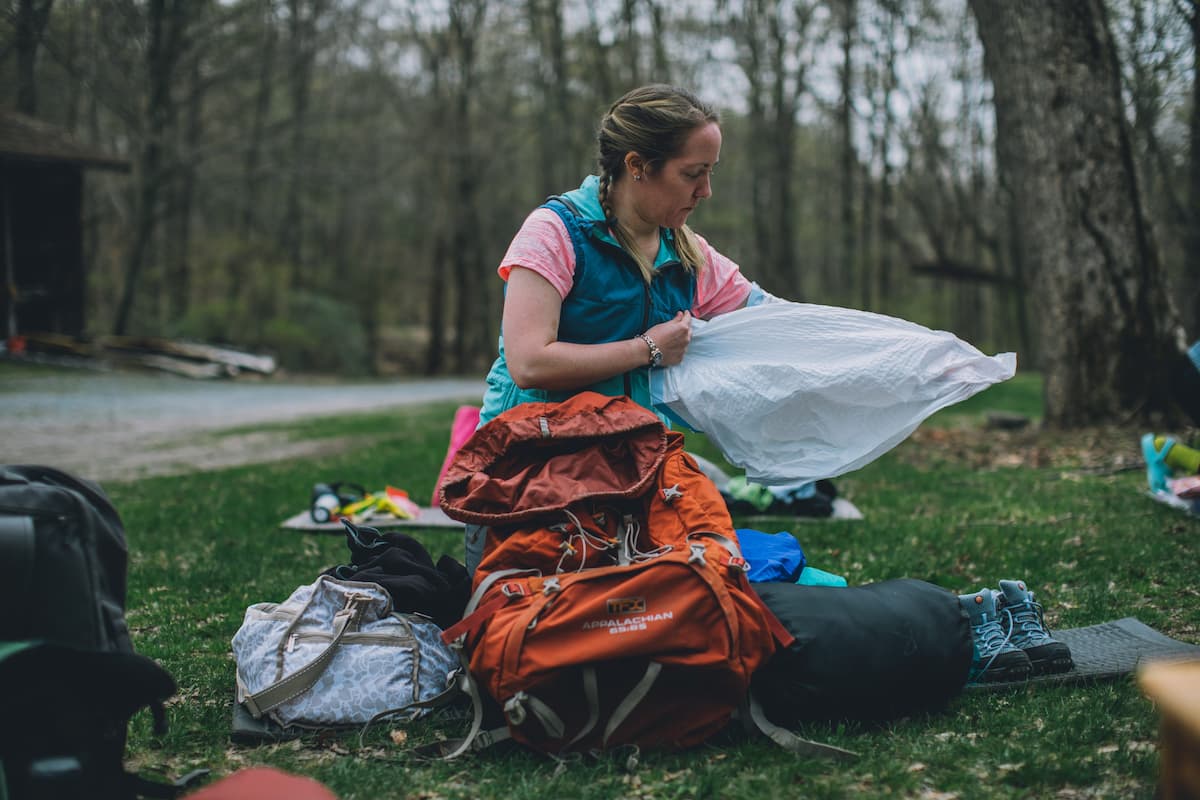
- Shrink your sleeping bag by using either a compression stuff sack or a garbage bag. Using a garbage bag will allow you not only to compress your sleeping bag but also to waterproof it. Read the time-tested technique described below, under “Dryness.”
- Warm and bulky clothing, such as jackets and pants, also can be placed in stuff sacks, but smaller clothing items—socks, shirts, upper and lower base layers—should be stuffed into empty spaces at the bottom of your pack.
- Containers such as pots, fry pans, cups, and bowls should be filled with smaller objects or food.
- Finally, once all of your equipment, clothing, and food are inside your pack, use the external compression straps to further cinch and shrink your pack, stabilizing your load.
Dryness
There are many ways to keep a pack dry. Here is a quick list of different ways to keep dry when the weather turns for the worst. –Contributed by Matt Heid:
- Garbage bags. The ultimate in lightweight, inexpensive, stay-dry versatility, garbage bags can be used in two primary ways: as a waterproof liner inside your backpack or as inside-the-stuff-sack protection for your clothes, sleeping bag, and other gear.For a pack liner, you’ll need a large, heavy-duty trash bag ample enough to accommodate all of your gear and durable enough to handle repeated use and abuse. Look for heavy-duty trash bags designed for outdoor cleanup with a thickness of at least 3 mil. Contractor bags work well; the best are orange or another bright color, which improves your visibility in the event of a survival situation. A heavy-duty trash bag can also serve double duty as an emergency shelter.
- Pack covers. Although you can use a garbage bag to cover the outside of your pack, it’s a poor substitute for an actual pack cover. Garbage bags flap wildly in the wind, don’t hold up well to brush and branches, and must be cut to allow shoulder straps to pass through. Pack covers, on the other hand, are typically made of lightweight coated nylon or ultralight silnylon, and feature an elastic cord that tightens around the pack, securing it in place. A cover protects most of your pack, as well as items lashed to the outside, from the elements.Pack covers do have weaknesses, however. Most notably, they don’t fully cover the area around your shoulder straps and hip belts. The area immediately above and around your shoulders is particularly vulnerable. In a daylong rain, water will often find its way in. And while they’re considerably more durable than garbage bags, pack covers can still snag and tear on brush and branches in densely forested terrain.Various sizes and materials are available. For a secure fit and maximum protection, select one that is just large enough for your needs. Oversized versions dangle loosely, making them more susceptible to snags and moisture. Pack covers run roughly $20 to $40, depending on the style and material.
- Zipper-closure bags. To protect smaller water-sensitive items (maps, electronics, etc.), a durable zipper-closure bag is hard to beat. Freezer-style versions are the best. They feature thicker and more durable plastic than lighter-weight sandwich bags. Avoid sliding closures, which are prone to failure after repeated use and often don’t provide a complete seal at the corners.To minimize air inside the zipper-closure bag, seal the bag nearly closed but leave a small opening at one end. After pushing as much air as possible out of the opening, use your mouth or a straw to suck out the remaining air and then quickly seal the bag closed.
- Waterproof stuff sacks and bags. In order for a stuff sack or dry bag to be completely waterproof, it must feature a waterproof material and a fully watertight closure system, typically a roll-top closure that seals with a clip. For hiking, lightweight coated nylon and polyester are common materials.For paddling, heavy-duty waterproof dry bags made from vinyl offer the extreme durability necessary to withstand repeated crammings into tight boat hatches. Dry bags with a clear window, or ones made entirely from see-through material, are a plus for quickly finding the right item of gear. A range of sizes and shapes are available, so you should be able to find options that work for the shape and capacity of your boat compartments. Paddling dry bags range from roughly $20 to $60, depending on size and features.One of the great challenges of a waterproof bag is getting excess air out so that you aren’t left with a puffy, hard-to-pack balloon. To avoid this, look for stuff sacks made with eVent, a fully waterproof material that keeps water out but lets air through, and dry bags that feature a one-way purge valve, which allows you to force air out while blocking outside air from entering.
Want to learn more outdoor skills? Check out AMC’s Mountain Skills Manual.